Deploy Workload (frontend)
In the previous step you created a TCP Load Balancer object that made the backend service available via the F5 Distributed Cloud Gateway. You will next deploy a “frontend” application that will use the TCP Load Balancer to access the backend service.
AWS Console
Before we can deploy the frontend application we will need to identify the IP address of the F5 Distributed Cloud Gateway. This IP address will be used for internal DNS resolution as well as the IP address of the VIP that was configured on the TCP Load Balancer previously.
Make sure that your F5 Distributed Cloud Gateway is fully up/online before deploying the workload resources the F5 Distributed Cloud Gateway is used as the internet gateway for the workload VM).
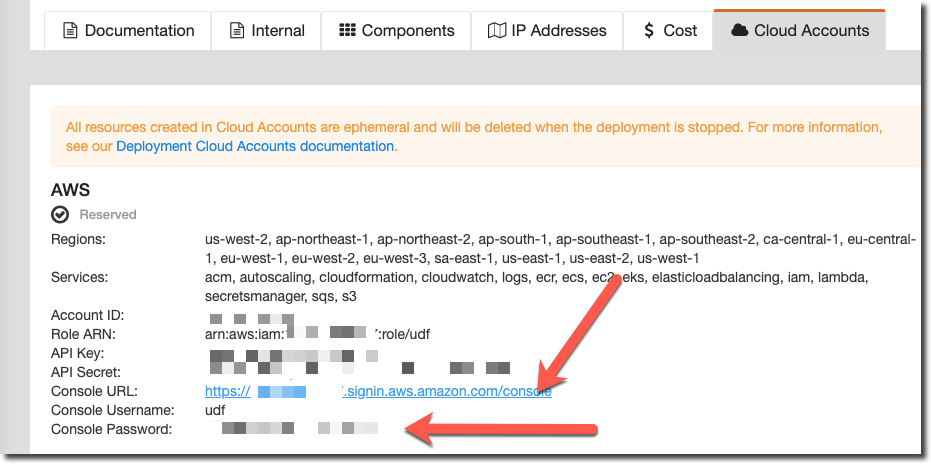
From the UDF console you will need to find the “Cloud Accounts” tab that contains the username/password that you will be using to access the AWS Console.
From your UDF environment access the “Client” host either via SSH or Web Shell.
Run the following commands to get the URL for your AWS Console (note that the URL from the “Cloud Accounts” tab may be set for the incorrect region).
$ cd ~/f5-volterra-labs-101/networking/terraform/
$ terraform output
  ...
  AWS_CONSOLE = "https://XXXXX.signin.aws.amazon.com/console?region=us-east-1"
  AWS_INSTANCE = "192.0.2.10"
  EXTERNAL_SUBNET_ID = "subnet-0f8ec509e82e4d3f5"
  INTERNAL2_SUBNET_ID = "subnet-06c3611948fc6fc83"
  INTERNAL_SUBNET_ID = "subnet-066c974f0e37f0326"
  _VPC_ID = "vpc-05767b378021fdc6c"
Open up the AWS Console URL (recommend using a private browsing window to avoid any existing AWS console sessions you may have) and enter the provided username/password.
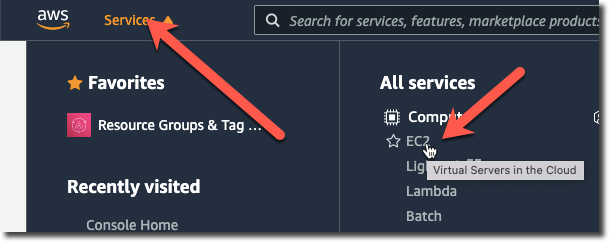
Click on “EC2” under “Services”.
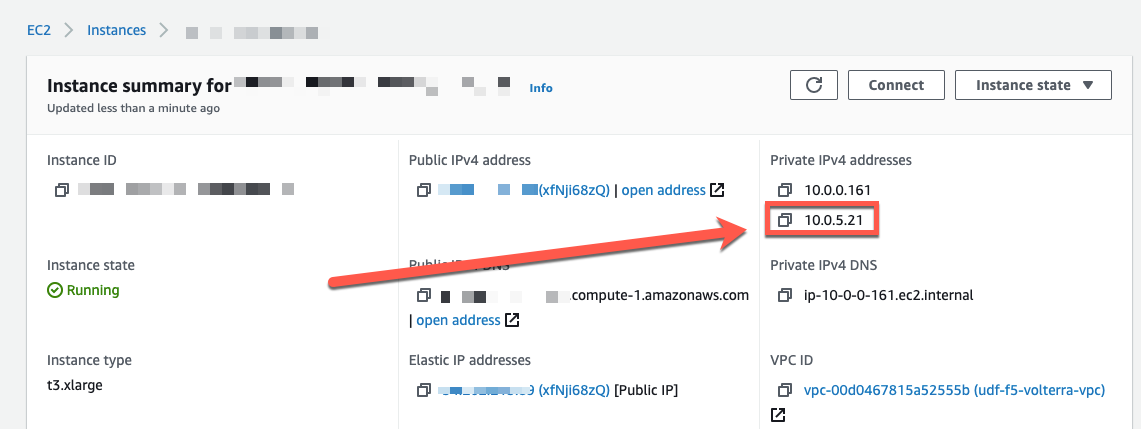
Click on “Instances” and you should see two instances running. Select the instance that is of type “t3.xlarge”. This is the primary node of your F5 Distributed Cloud Gateway (in an HW deployment there would be multiple instances).
Note
If you do not see any instances you may be in the incorrect AWS region. The “AWS_CONSOLE” value from running “terraform output” previously should contain the region (i.e. us-east-1). You can also try “us-west-2” (fallback value).
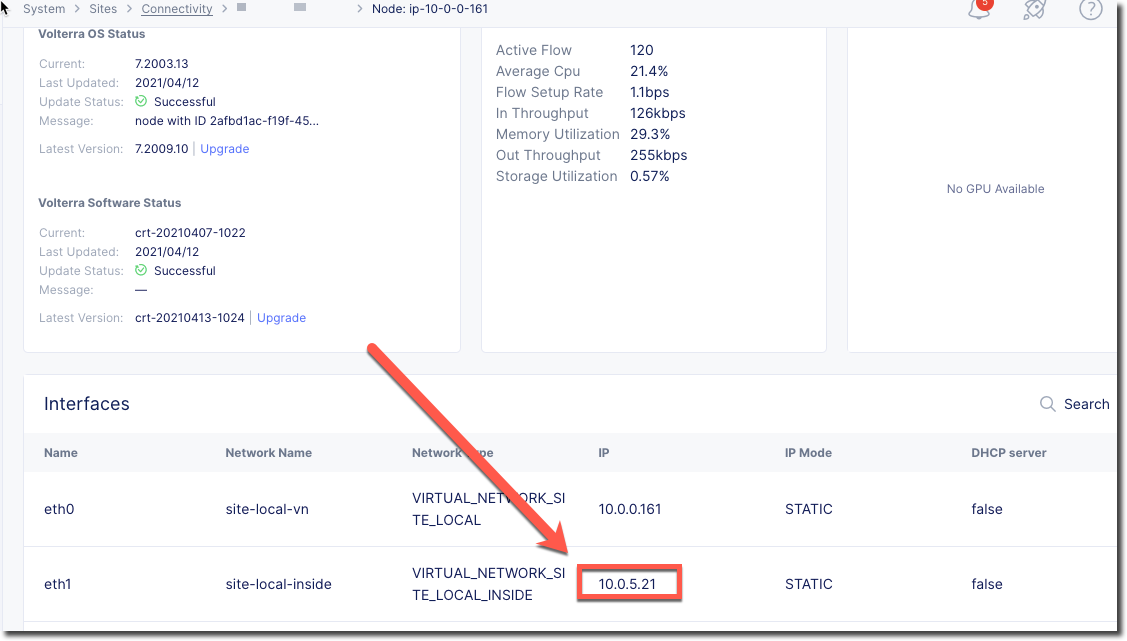
Take note of the private ip of the internal interface. It should be on the 10.0.5.0/24 network. You will use the IP address next to configure your workload instance.
You can alternately get this same information from F5 Distributed Cloud Console by clicking on the “Nodes” tab for your site and selecting the node.
Deploy Workload
On the Ubuntu Client (via webshell or SSH) access the following directory.
$ cd ~/f5-volterra-labs-101/networking/workload
This directory contains Terraform code that will deploy the frontend resource. In the previous run of Terraform it also updated this directory to specify the VPC/Subnet to deploy the workload resource. You will need to provide the Private IP address of the F5 Distributed Cloud Gateway on the subnet that you deploy your workload. The Private IP is the one that you previously captured while looking at the AWS Console.
run “terraform apply” and enter the private IP when prompted for the F5 Distributed Cloud Gateway.
ubuntu@ubuntu:~/f5-volterra-labs-101/networking/workload$ terraform apply
var.volterra_gateway
  Enter a value: 10.0.5.XX
Enter “yes” when prompted.
You will then see an output that includes the IP address of the workload instance. Record this IP address, you will need it in the next step when you configure the HTTP Load Balancer.
Apply complete! Resources: 1 added, 0 changed, 0 destroyed.

Outputs:

workload_ip = "10.0.3.14"