Getting Started (F5 Distributed Cloud Console)
During this exercise you will be introduced to F5 Distributed Cloud Console
Terminology
- F5 Distributed Cloud Console
F5 Distributed Cloud Console is a SaaS control-plane for F5 Distributed Cloud services that provides a UI and API for managing network, security, and compute services. F5 Distributed Cloud Console can manage “sites” in existing on-prem data centers and sites in AWS, Azure, and GCP cloud environments. Using F5 Distributed Cloud Console, an end-user can centrally manage a distributed application environment.
- Namespace
Namespace is a term that is commonly used in Kubernetes. It can be thought of as a grouping of resources.
Exercise #1: Login to F5 Distributed Cloud Console
The name of the tenant that we will be using is f5-consult.
You will receive an email with an invitation to access F5 Distributed Cloud Console.
Login has been federated to Azure AD, so once you have activated your account, you will be logging in with your F5 credentials + DUO 2FA
Warning
If you have NOT received an email from F5 Distributed Cloud to activate your account, please inform the instructor.
The following is a video that covers the steps involved.
Exercise 2: Select your Persona
Please log into your assigned F5 Distributed Cloud tenant.
https://f5-consult.console.ves.volterra.io/When you first login you will need to select your “persona”
Enter your persona as “SecOps” and level as “Intermediate”. You can change these settings after logging in as well.
Your persona will highlight workflows within F5 Distributed Cloud. You will be able to access all services, but making use of personas can focus your view on particular tasks that are relevant to your role.
Several tooltips will appear. You can close these out.
Note
The F5 Distributed Cloud Console GUI has a relatively short timeout. This is not configurable. We have an enhancement request to allow this to be configured.
Exercise 3: Identify your Namespace
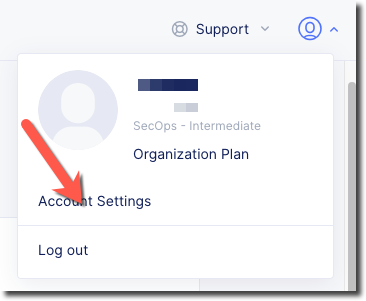
Click on “Account Settings” by expanding the “Account” icon in the top right of the screen and clicking on “Account Settings”
Next click on “My Namespaces” and take note of the x-surname namespace that you have been assigned.
Note
Your Namespace will be the user-part of your F5 email address with the period replaced with a hyphen. For example, if your F5 email address is
j.smith @ f5.comyou can find a namespace ofj-smithPlease note this name and use it in later steps to make it easier for others to distinguish between resources in shared namespaces.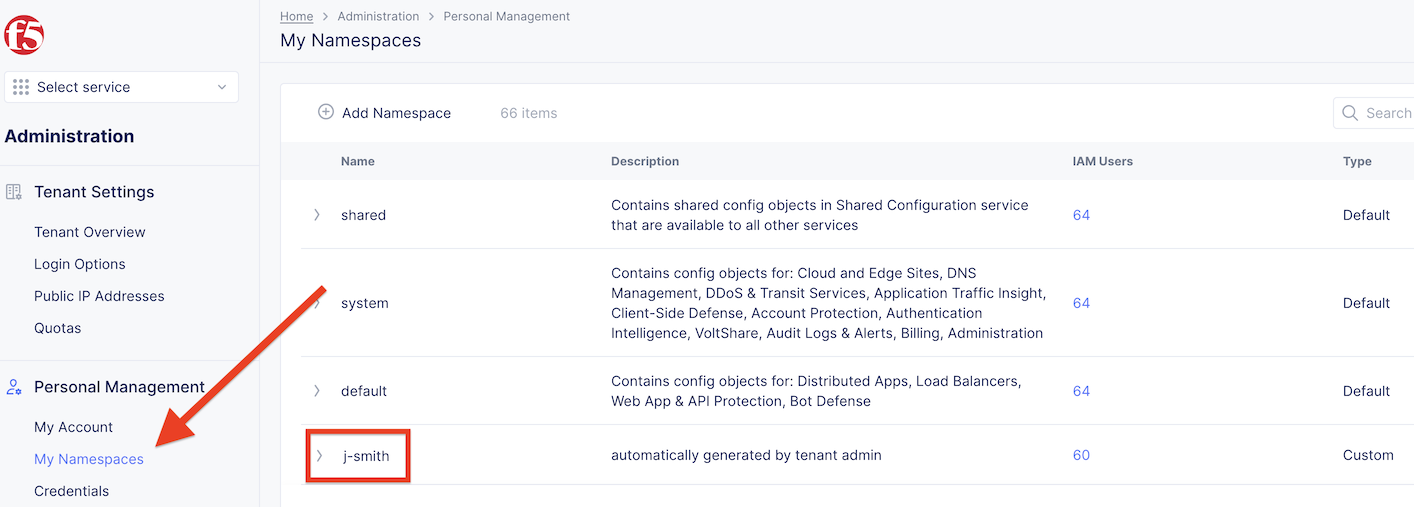

You have reached the end of this lab. For instructor-led courses, do not continue until instructed to do so.