Virtual Kubernetes
In this section we will create a Virtual K8s configuration in F5 Distributed Cloud Console.
Exercise 1: Create Virtual K8s
In F5 Distributed Cloud Console ensure you are in the Distributed Apps context and have selected your namespace.

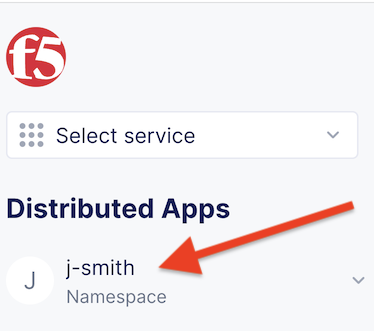
Ensure you have selected your assigned namespace
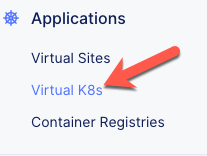
Navigate the menu to go to Application->*Virtual K8s*.
Click the Add Virtual K8s button.
Enter the following variables:
Variable
Value
Name
your_namespace-vk8s
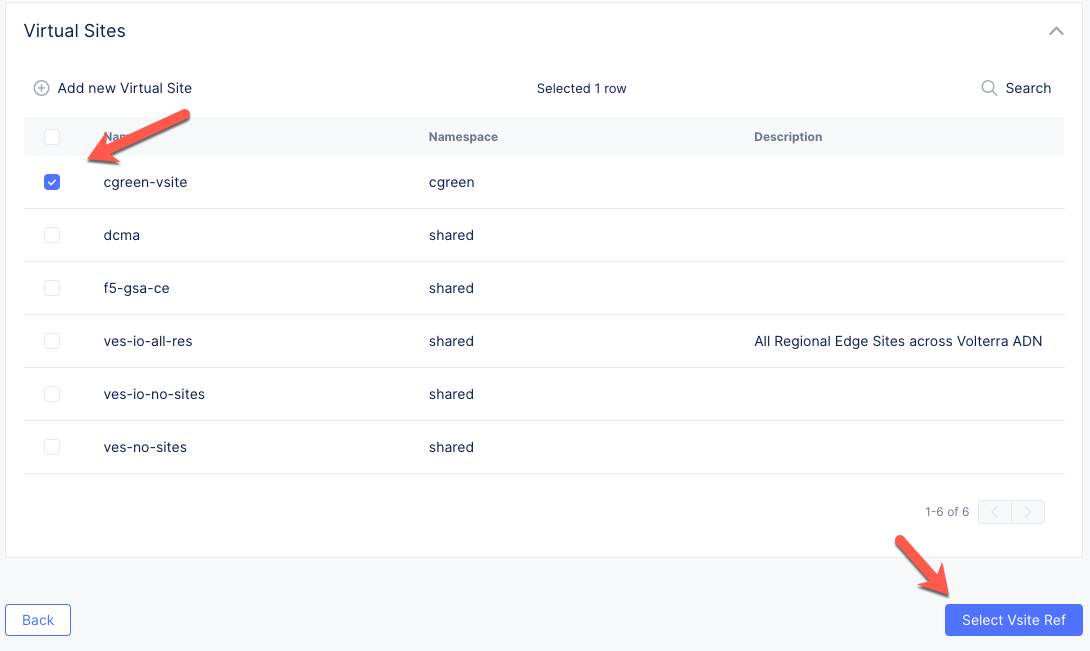
Click the Select Vsite Ref button.
Select the Virtual Site you created.
Click the Select Vsite Ref button.
Click the Save and Exit button.
F5 Distributed Cloud Console will now create your Virtual K8s cluster.

Exercise 2: Create Virtual K8s Workload for the Single-page App
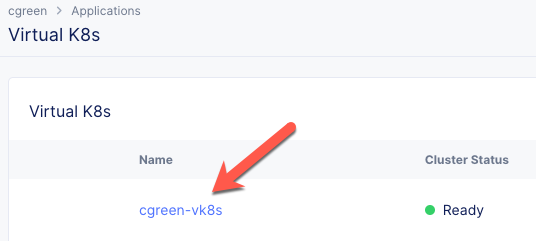
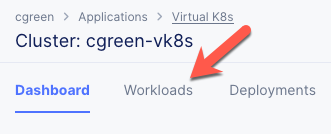
Once your Virtual K8s cluster is ready, select the cluster name in the Virtual K8s list.
Click the Workloads tab.
Click the Add vK8s workload button.
Enter the following variables:
Variable
Value
Name
brews-spa
Select Type of Workload
Service
Under the Service section, click the Configure link.
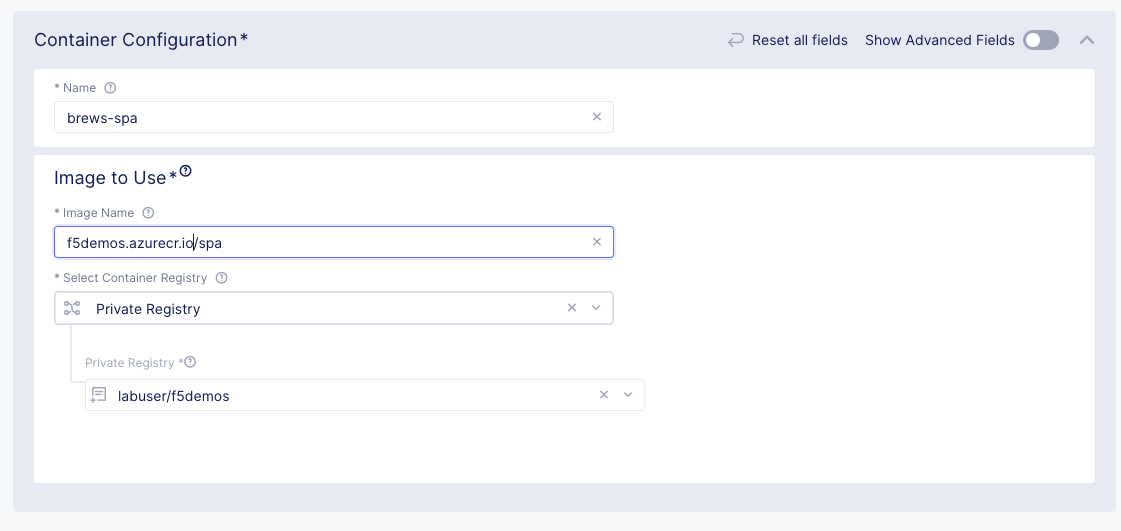
Enter the following variables in the Containers section.
Variable
Value
Name
brews-spa
Image Name
f5demos.azurecr.io/spa
Select Container Registry
Private Registry
Private Registry
Select the private registry you created previously
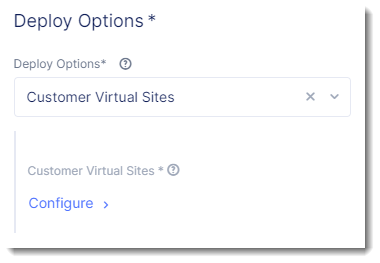
Enter the following variables in the Deploy Options section.
Variable
Value
Where to Deploy the workload
Customer Virtual Sites
Under Customer Virtual Sites, click the Configure link.
Select the Virtual Site you created in the previous section.
Click the Apply button.
Under Advertise Option, choose Advertise In Cluster.
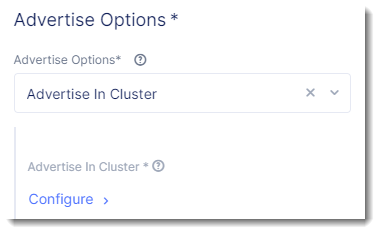
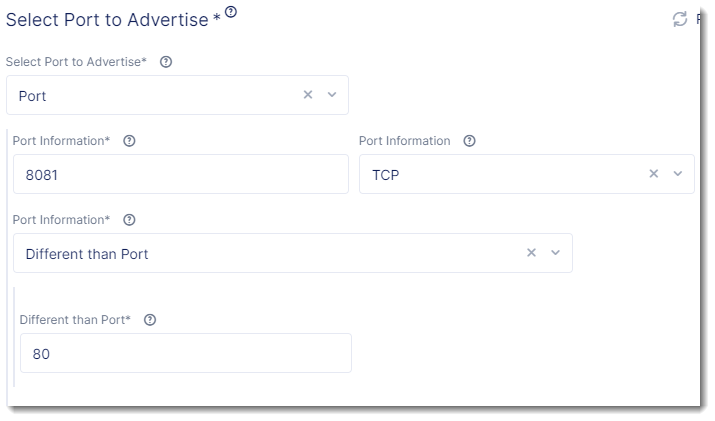
Click on the Configure link, and enter the following variables:
Variable
Value
Port
8081
Show Advance Fields
Toggle On
Port Information
Different than Port
Different than Port
80
Click the Apply button.
Click the Apply button.
Click the Save and Exit button.
Exercise 3: Create Virtual K8s Workload for the API
Click the Workloads tab.
Click the Add vK8s workload button.
Enter the following variables:
Variable
Value
Name
brews-api
Select Type of Workload
Service
Under the Service section, click the Configure link.
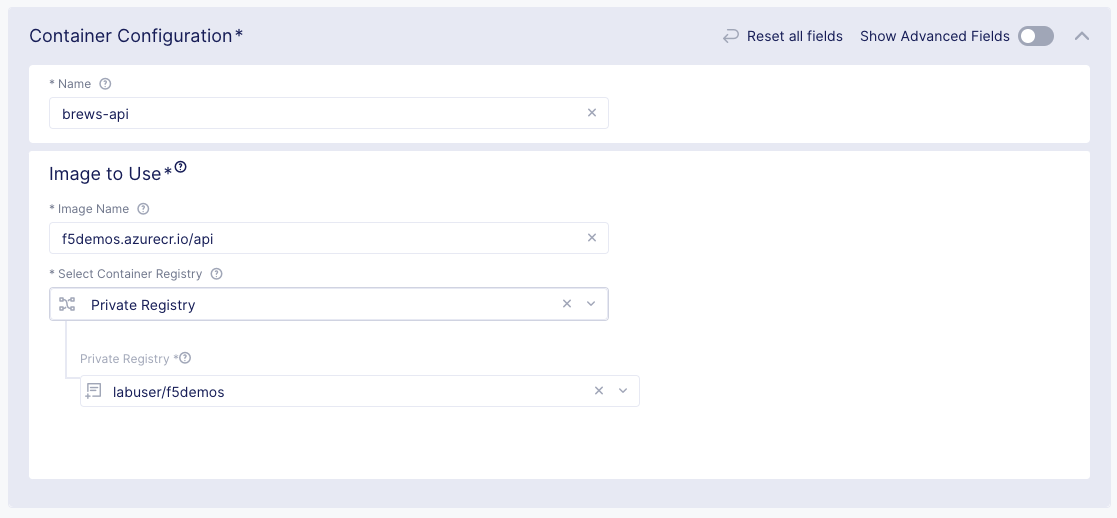
Enter the following variables in the Containers section.
Variable
Value
Name
brews-api
Image Name
f5demos.azurecr.io/api
Select Container Registry
Private Registry
Private Registry
Select the private registry you created previously
Configuration
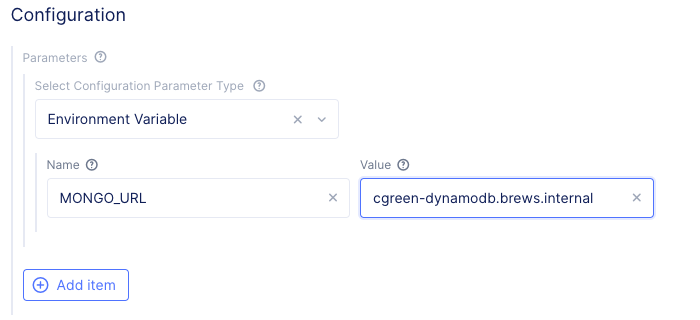
Under the Configuration section click the Add item button.
Enter the following variables:
Variable
Value
Select Configuration Parameter Type
Environment Variable
Name
MONGO_URL
Value
your_namespace-mongodb.brews.local
Enter the following variables in the Deploy Options section:
Variable
Value
Where to Deploy the workload
Customer Virtual Sites
Under Customer Virtual Sites, click the Configure link.
Select the Virtual Site you created in the previous section.
Click the Apply button to close the “Deploy Options” dialogue.
Under Advertise Option, choose Advertise In Cluster. (default is Advertise in Cluster)
Click on Configure
Enter the following variables:
Variable
Value
Port
8000
Click the Apply button to close the “Advertise Options” dialogue.
Click the Apply button to close the “Service” dialogue.
Click the Save and Exit button to create the Workload.
You should now see your two workloads with 1 Running/Completed Pods per workload.

Note
The vK8s Workload target is the Virtual Site abstraction. If DemoBrews spun up a new Customer Edge site, regardless of CSP, and tagged the site with the correct site selector the workload would be deployed to the new site and the service would be exposed via the HTTP Load Balancer automatically.