Deploy AWS Site
Previously for the “on-prem” site you needed to manually provision and configure a node for use with F5 Distributed Cloud Console. Deploying a site in AWS, Azure, and Google Cloud Platform uses a process that automates the steps of deploying the site. This enables F5 Distributed Cloud Console to perform the deployment on behalf of the end-user (you can also use Terraform to deploy a site, but that will be covered in a separate lab).
Exercise 1: Deploy AWS Site
In your lab environment you will need to create an AWS VPC.
From your UDF environment access the “Client” host either via SSH or Web Shell.
Run the following commands to deploy the VPC.
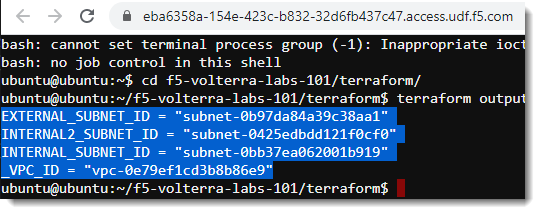
$ cd f5-volterra-labs-101/networking/terraform/
$ terraform apply -auto-approve
  ...
  AWS_CONSOLE = "https://XXXXX.signin.aws.amazon.com/console?region=us-east-1"
  AWS_INSTANCE = "192.0.2.10"
  EXTERNAL_SUBNET_ID = "subnet-0f8ec509e82e4d3f5"
  WORKLOAD_SUBNET_ID = "subnet-06c3611948fc6fc83"
  INTERNAL_SUBNET_ID = "subnet-066c974f0e37f0326"
  _VPC_ID = "vpc-05767b378021fdc6c"
Note
Notice that the AWS region will vary depending on which UDF region you selected. You may want to copy the URL for AWS_CONSOLE to use later in the lab.
If you see the following
Error: Error launching source instance: InvalidKeyPair.NotFound: The key pair 'udf-key' does not exist
            status code: 400, request id: xxxxxxxx-xxxx-xxxx-xxxxxxxxxx
Please run the following command:
$ ~/init-cloud.sh
This command should reset the environment.
If you see the following error
Error: Error launching source instance: PendingVerification: Your request for accessing resources in this region is being validated, and you will not be able to launch additional resources in this region until the validation is complete. We will notify you by email once your request has been validated. While normally resolved within minutes, please allow up to 4 hours for this process to complete. If the issue still persists, please let us know by writing to aws-verification@amazon.com for further assistance.
      status code: 400, request id: 99a5736b-02c4-4aff-9781-4b559e337375
You may need to retry the command again. This is due to the AWS account not having used that particular region before.
If you are using the “Web Shell” you can highlight the output to copy it into your clipboard.
From the UDF interface click on the “Cloud Accounts” tab. Copy down the value of API Key and API Secret.
You will use these values later to provision the F5 Distributed Cloud node from F5 Distributed Cloud Console.
Important
API Key should not be confused with the Account ID in the below screenshot. This will cause an issue with the terraform apply of the AWS site.

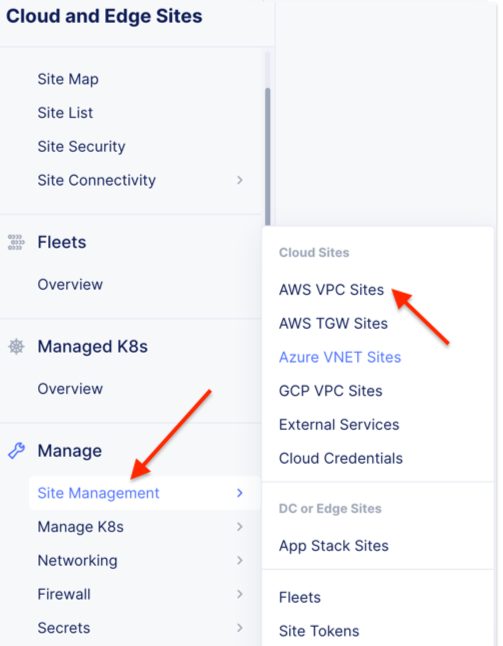
In Distributed Cloud Console and switch to the Cloud and Edge Sites context. It can be access either from the Home page or an internal page.
Navigate to “Site Management” -> “AWS VPC Sites”.
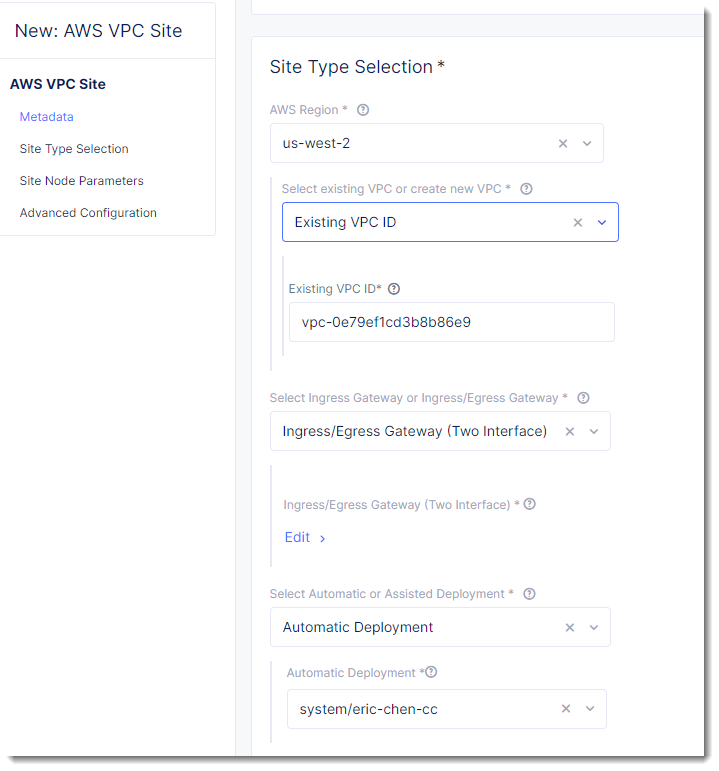
Under “New AWS Site” you will need to provide the following information:
Name: [unique name]-awsnet (name is limited to 16 characters, adjust as needed)
AWS Region: us-west-2
Change from “New VPC Parameters” to “Existing VPC ID”
Existing VPC ID specify the “_VPC_ID” value that you collected earlier
Change “Ingress Gateway” to “Ingress/Egress Gateway (Two Interface)”
Click on “Configure”**(appears after **”Select Ingress Gateway”…)
Under the section for “Nodes” provide the following information
Under Ingress/Egress Gateway (two Interface) Nodes in AZ, click Add Item
Click on “Show Advanced Fields” (top right)
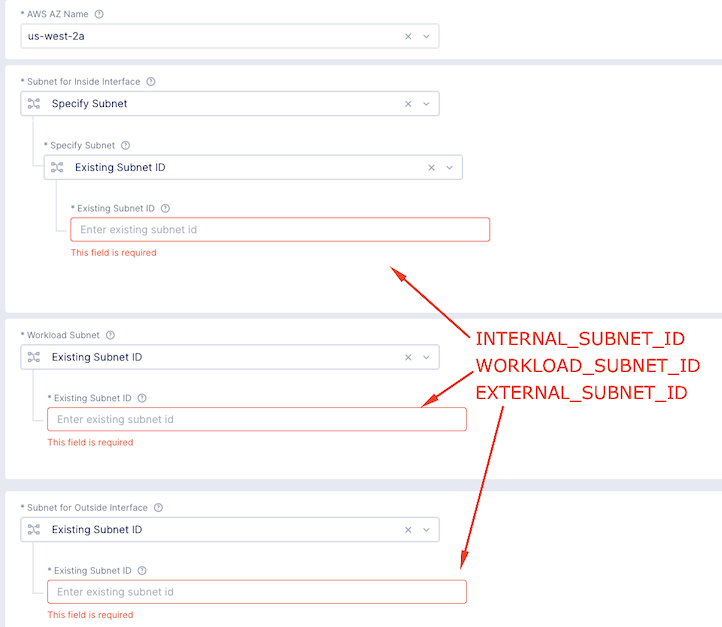
AWS AZ Name: us-west-2a
Select the “Specify Subnet” option under the ‘Subnet for Inside Interface’ dialog box
Change from “New Subnet” to “Existing Subnet ID”
Enter the value of “INTERNAL_SUBNET_ID”
Under “Workload Subnet” also change to “Existing Subnet ID” and enter “WORKLOAD_SUBNET_ID”
Under “Subnet for Outside Interface” also change to “Existing Subnet ID” and enter “EXTERNAL_SUBNET_ID”
Click on Apply to complete gateway configuration
Click on “Apply” to complete node configuration
Note
The lab uses “Automatic Deployment”. If you would like to explore using an “Assisted Deployment” see the optional lab exercise here: Assisted Deployment
Under “Automatic Deployment” use the select list to click on the “Create New Cloud Credential”.
Under “Select Cloud Credential Type” choose AWS Programmatic Access Credentials
Give the credential a name (i.e. [unique namespace]-aws-cc)
Under “Access Key ID” Enter the API Key that you captured earlier from the UDF Cloud Accounts.
Under “Secret Access Key” click Configure
In the text field paste in your API Secret that you captured ealrier from the UDF Cloud Accounts.
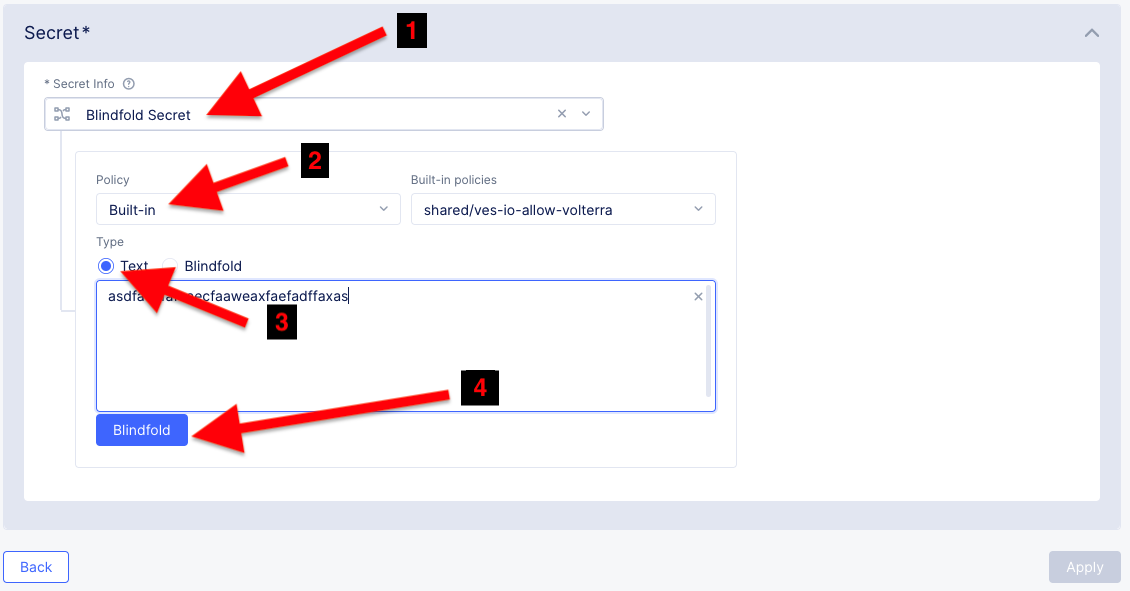
After you fill in the Secret Key you will need to click on “Blindfold” button (do not click on the radio button)
Click “Apply”
Click “Continue”
The resulting inputs should look something like the following (do not copy these values, yours will differ).
Then click on “Save and Exit”
In this state the site is ready to be deployed. You will need to click on “Apply” to start the provisioning of the resource. You can also use this interface to decommission the resource as well.

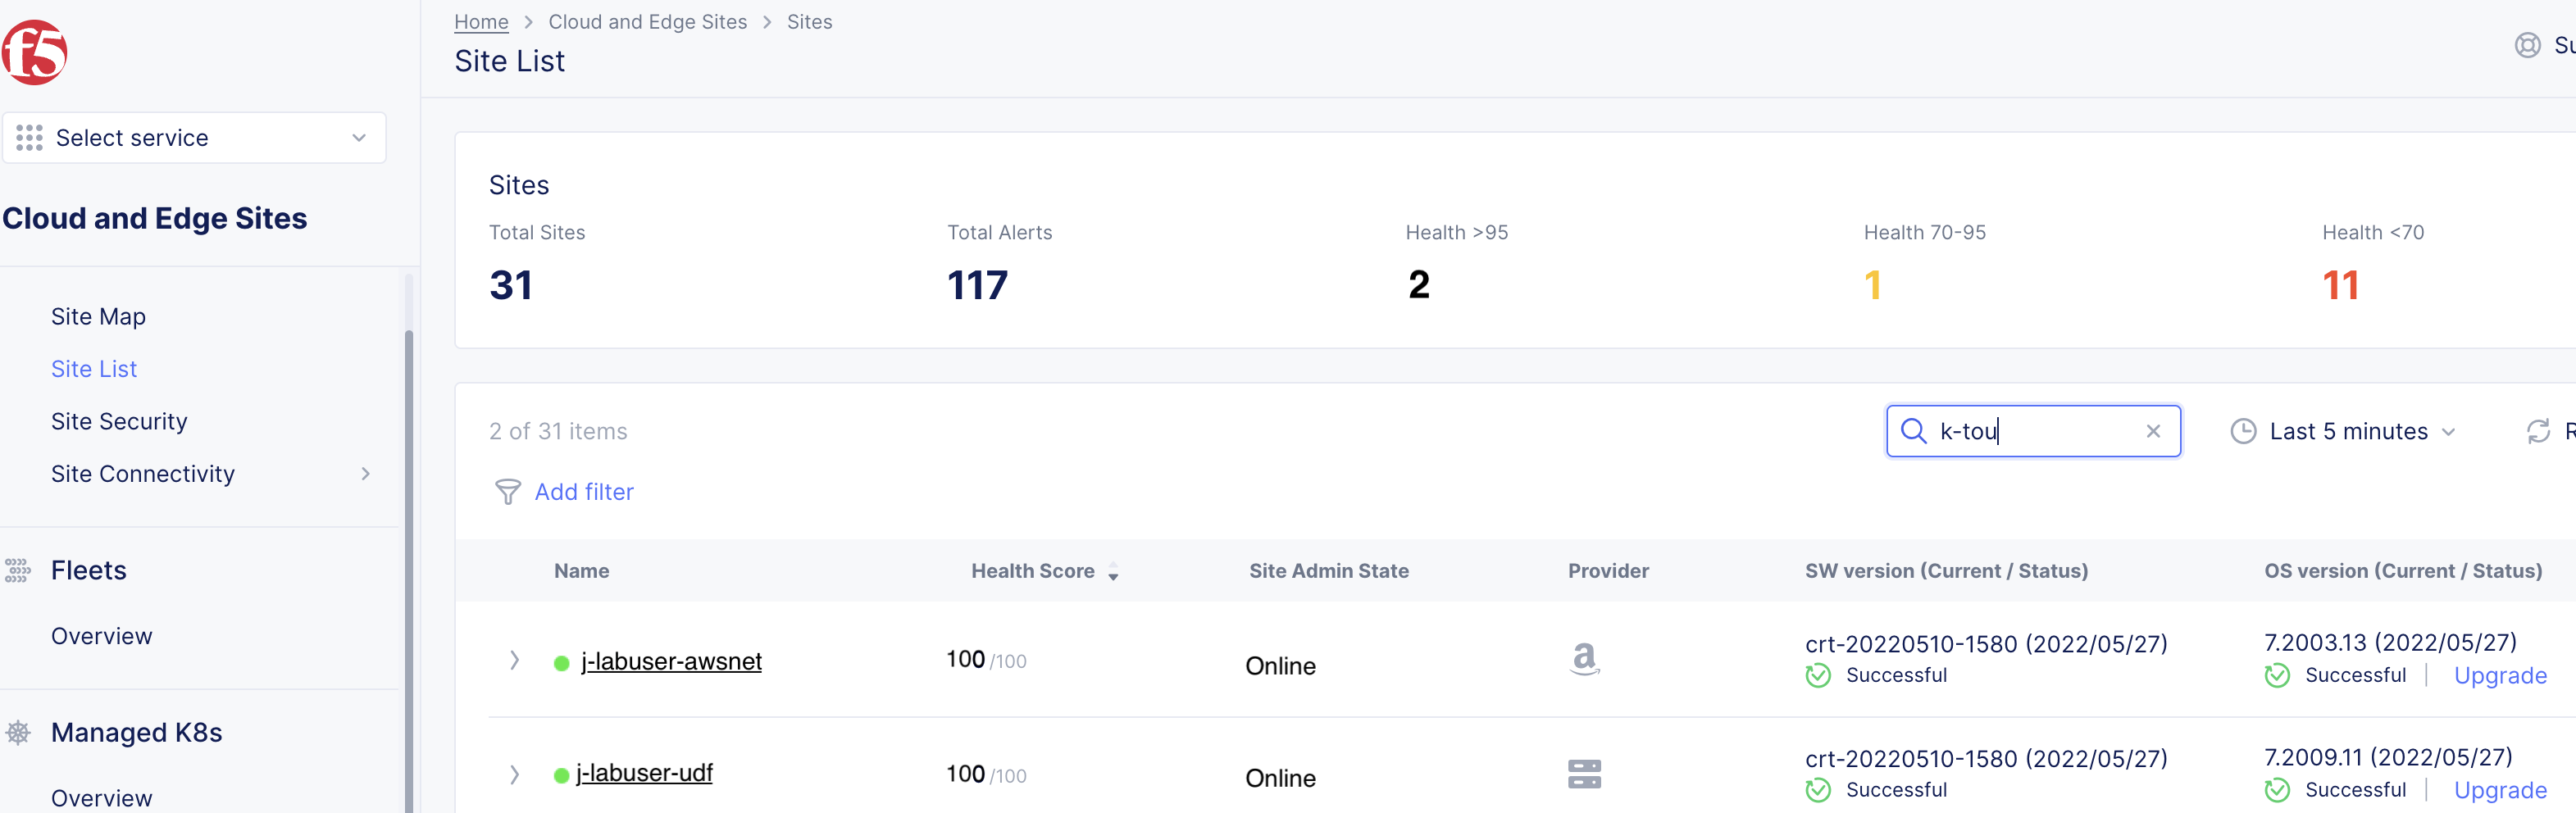
In F5 Distributed Cloud Console browse to “Sites->Site List” under the Cloud and Edge Sites context to view your sites.
After several minutes you should see both your UDF and AWS sites appear green in F5 Distributed Cloud Console.

You have reached the end of this lab. For instructor-led courses, do not continue until instructed to do so.