Create TCP Load Balancer
In this section we will create a TCP load balancer so we can present the MongoDB in both the UDF and AWS sites. This will be needed so that the API service running in the AWS site can access the on-premise database.
Exercise 1: Create MongoDB Origin Pool
In F5 Distributed Cloud Console ensure you are in the Load Balancers context.
Ensure you have selected your assigned namespace
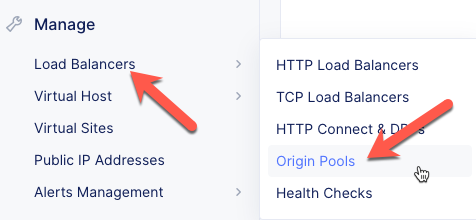
Navigate the menu to go to Manage -> Load Balancer, then click Origin Pools.
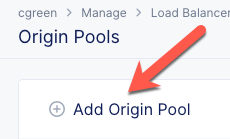
Click the Add Origin Pool button.
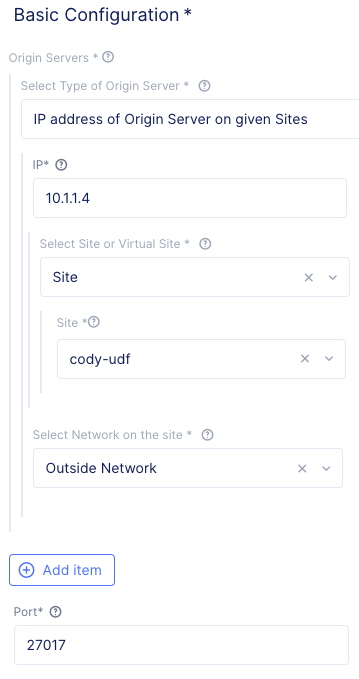
Enter the following variables:
Variable
Value
Origin Pool Name
brews-mongodb
Select Type of Origin Server
IP address of Origin Server on given Sites
IP address
10.1.1.4
Site
Your UDF site
Select Network on the site
Outside Network
Port
27017
Under the List of Health Check(s) section, click the Select healthcheck dropdown.
Click the Create new Healthcheck button.
Enter the following variables:
Variable
Value
Name
brews-mongodb
Health Check
TCP HealthCheck
Click on the “Configure” button to open the dialog to adjust timeout settings then click “Apply”
Click the Continue button to close the Health Check Parameters dialogue.
Click the Save and Exit button to close the Origin Pool dialogue.
Exercise 2: Create MongoDB TCP Load Balancer
In F5 Distributed Cloud Console ensure you are in the Load Balancers context.
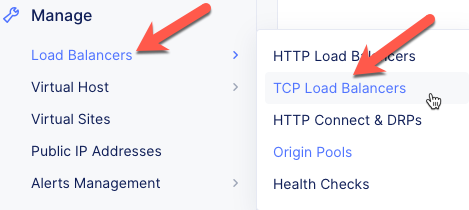
Navigate the menu to go to Manage -> Load Balancer, then click TCP Load Balancers.
Click the Add TCP Load Balancer button.
Enter the following variables:
Variable
Value
Name
brews-mongodb
Listen Port
27017
Where to Advertise the VIP
Advertise Custom

Configure Domains
Under the Domains section (above the port configuration) click the Add item button.
Enter a domain:
Variable
Value
Domain
your_namespace-mongodb.brews.local
Configure Origin Pools
Under the Origin Pools section, click the Configure link.
Click the Add item button.
Select the brews-mongodb pool.
Click the Apply button to close the Origin Pools dialogue.
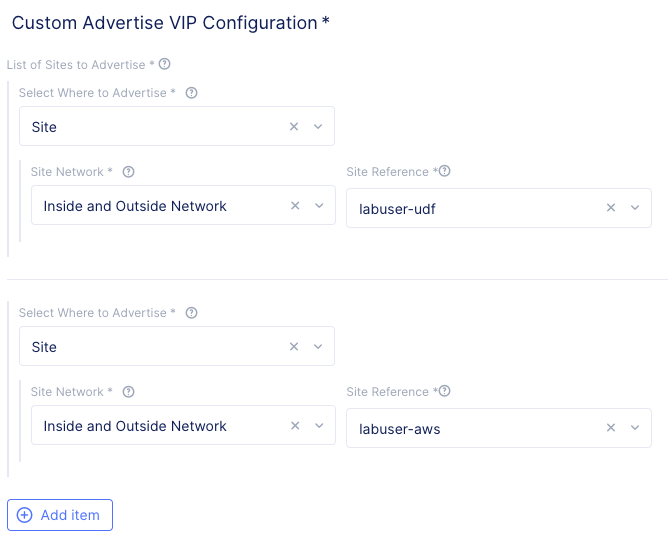
Configure Advertisement
Under Advertise Custom click the Configure link.
You will need to add two sites:
Your UDF site:
Variable
Value
Select Where to Advertise
Site
Site Network
Outside Network
Site Reference
Your UDF site
Your AWS site:
Click on “Add Item” to input your second site.
Variable
Value
Select Where to Advertise
Site
Site Network
Outside Network
Site Reference
Your AWS Site
Click the Apply button to exit the Advertise Custom dialogue.
Click the Save and Exit button to exit the TCP Load Balancer dialogue.
Exercise 2: Configure Demo Application
Now that we have an internal TCP load balancer for MongoDB we need to configure the demo application to use it.
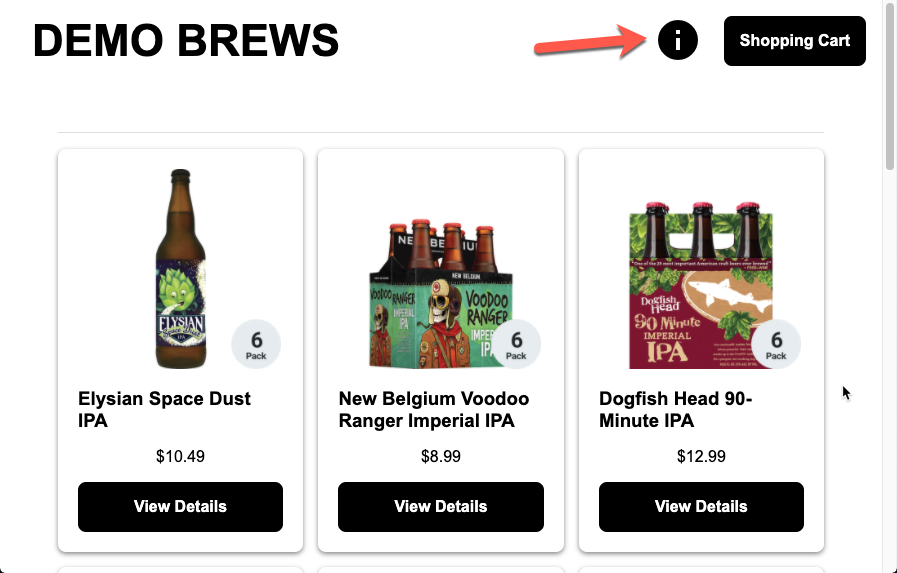
Open the demo application in your browser.
Note
If you do not remember the FQDN, you can look under Manage -> Load Balancers to get it.
Click on the information icon.
Click on the gear icon for the database.
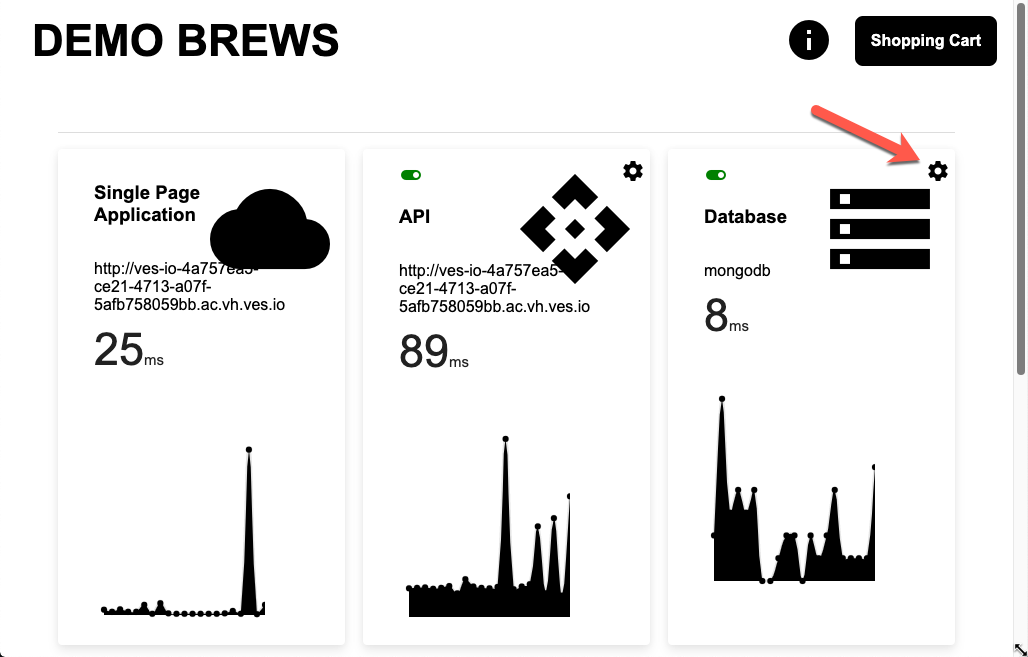
Enter the TCP load balancer hostname: your_namespace-mongodb.brews.local
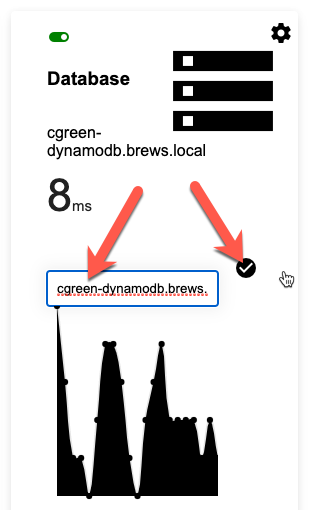
Click the button or press Enter.
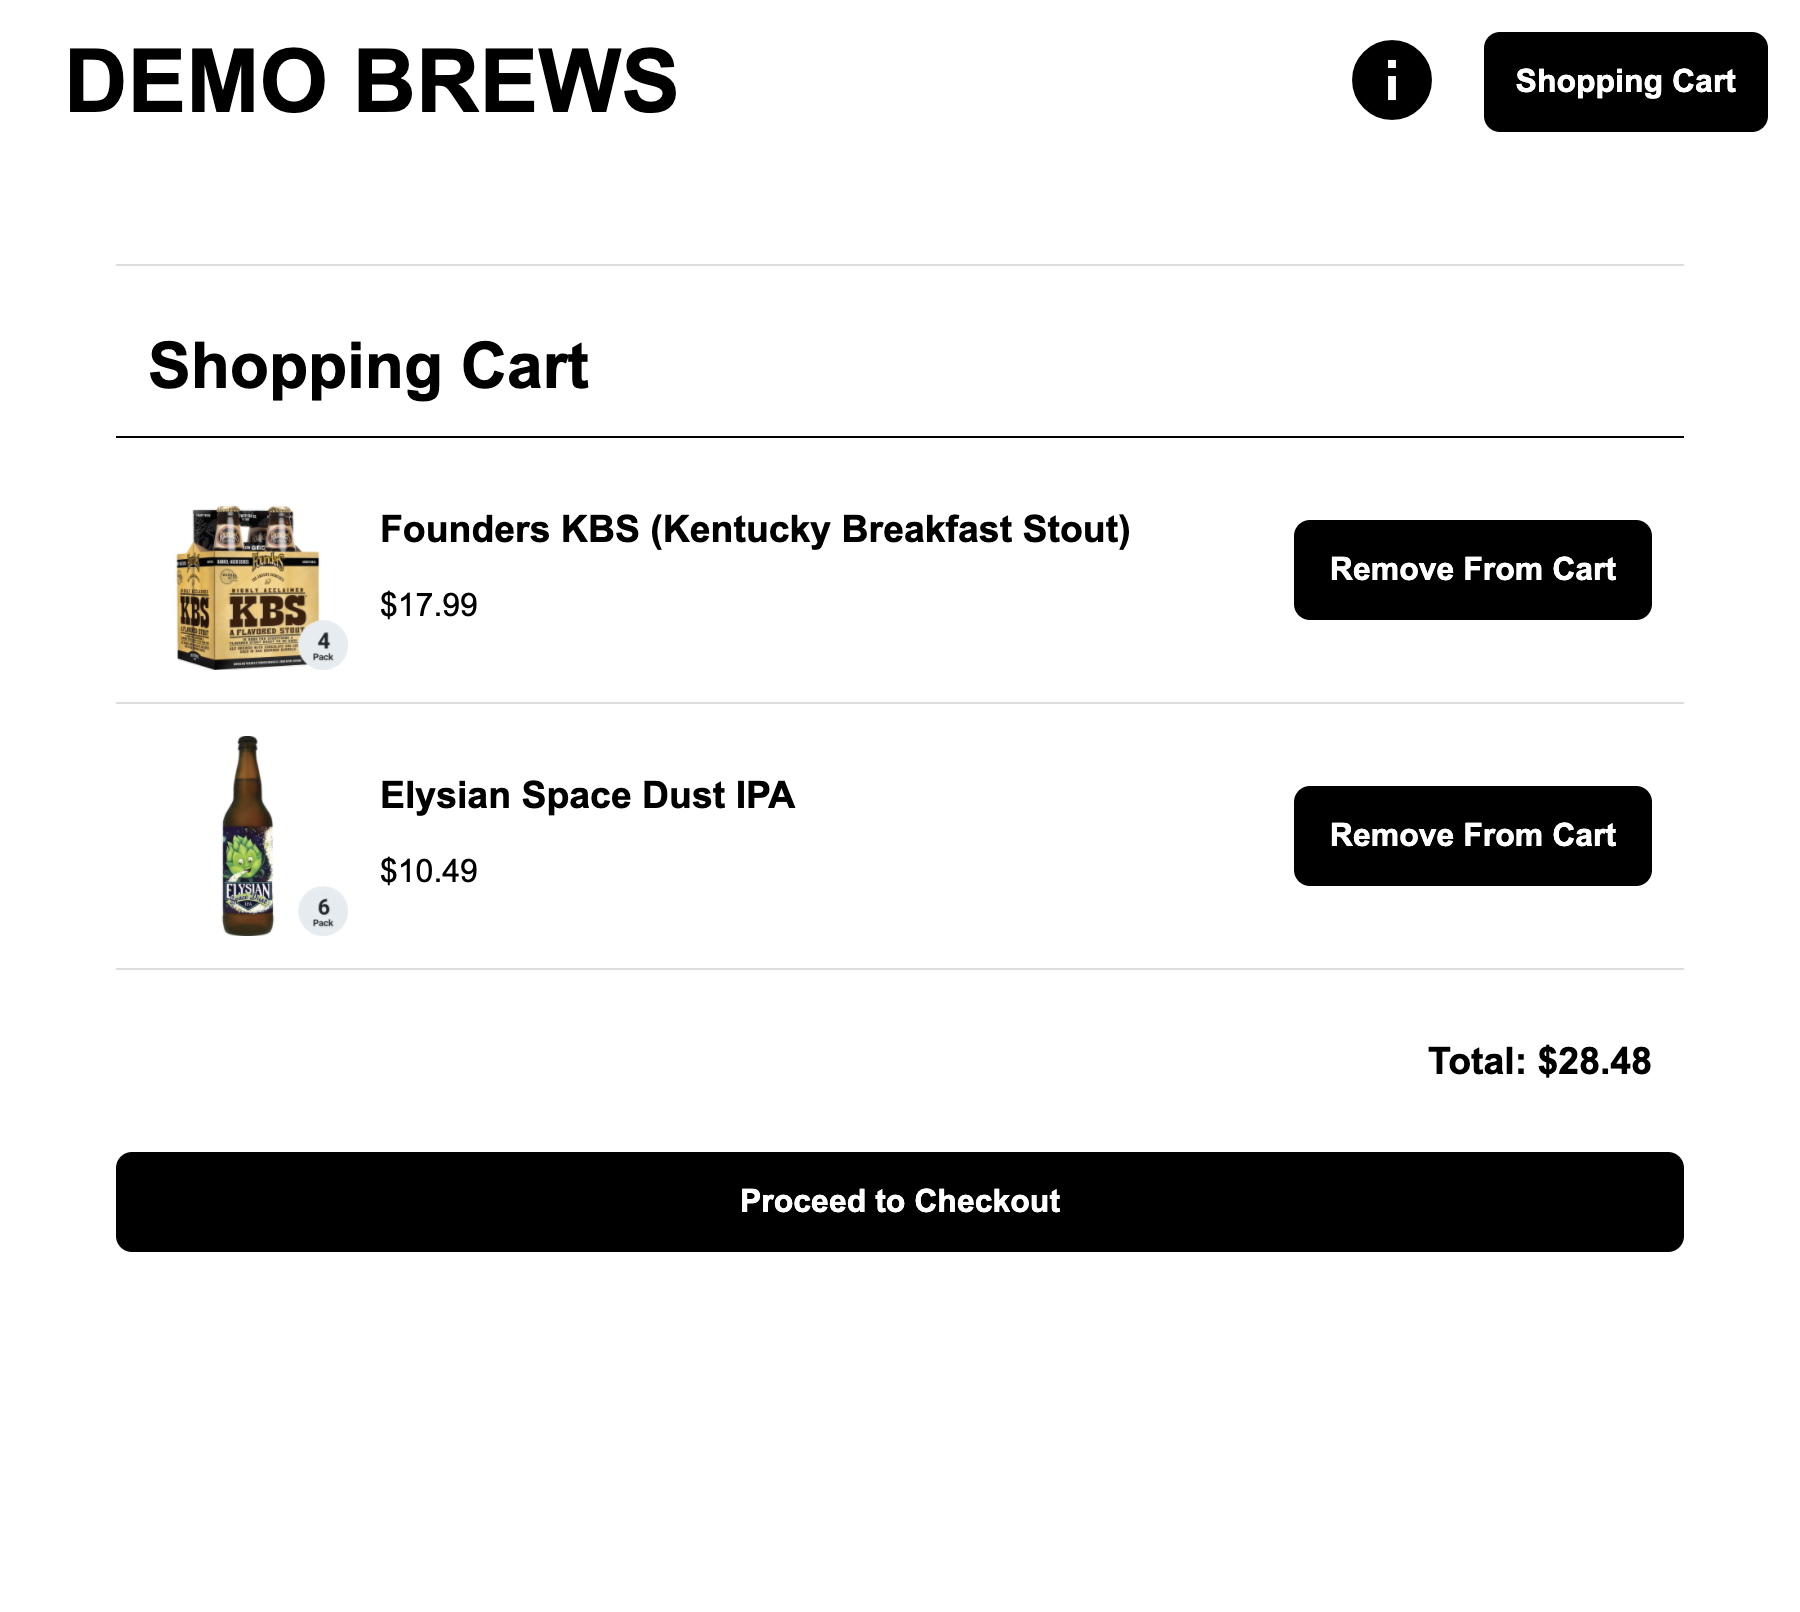
If everything is working correctly, the database cart should not turn red. You can also add and remove items from your cart for a further test.
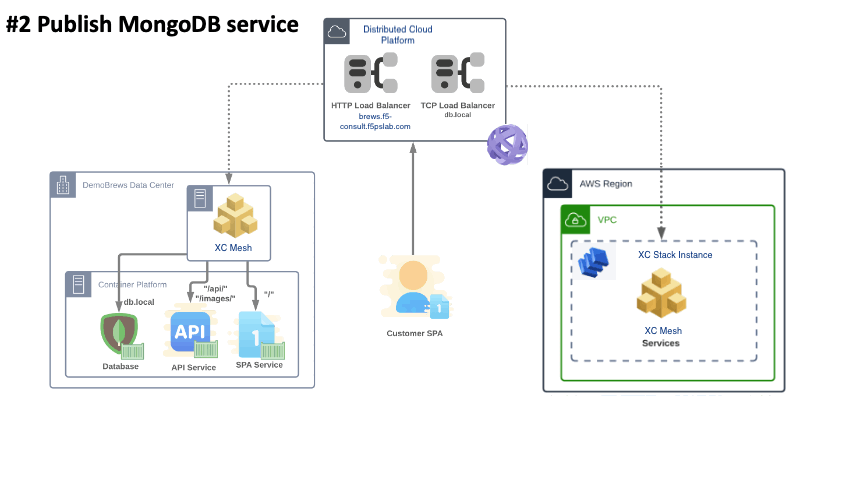
Packet flow
Below is the packet flow for the architecture you just deployed in F5 Distributed Cloud.

You have reached the end of this lab. For instructor-led courses, do not continue until instructed to do so.