Create HTTP Load Balancer
Now that we’ve defined our Origin Pools for the SPA and API service, we need to attach the pools to an HTTP Load Balancer. The HTTP Load Balancer will direct traffic to our pools based on URI through the concept of “Routes”.
Exercise 1: HTTP Load Balancer Basic Configuration
Start in F5 Distributed Cloud Console and switch to the Load Balancers context.
Ensure you have selected your assigned namespace
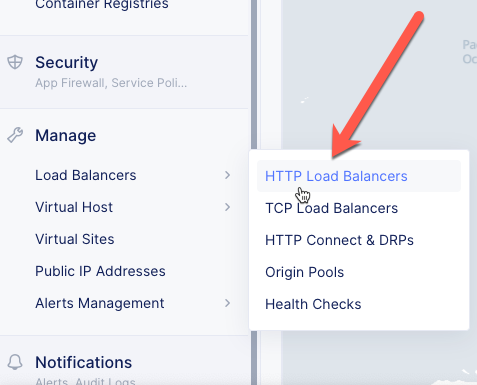
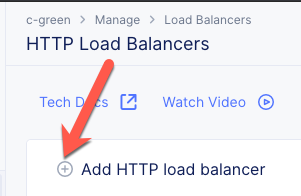
Navigate the menu to go to “Manage”->”HTTP Load Balancers” and click on “Add HTTP Load Balancers”.
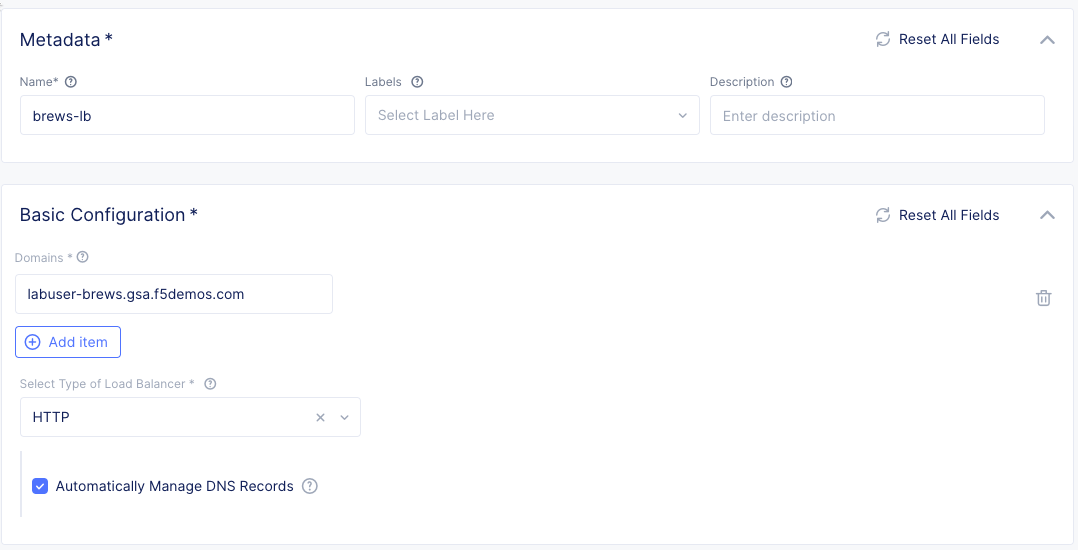
Enter the following variables:
Variable
Value
Name
brews-lb
Domains
[unique name]-brews.[supplied domain name for your tenant]
Select type of Load Balancer
HTTP
Automatically Manage DNS Records
Yes/Check
Note
If your tenant does not use a delegated domain you can disable the option to automatically manage DNS records. You can supply an arbitrary domain (example.com) and later you can use the following command to verify.
$ curl --resolve [unique-name]-brews.example.com:80:[IP address of ves.io name created by LB] http://[unique-name]-brews.example.com
Exercise 2: Configure Default Origin Server
We’ll next configure the “Default Origin Servers”. These are the Origin Servers that will be used for requests without a more specific route. For the DemoBrews application, we want to send traffic not related to the API service (or images) to the SPA service.
Click on the Configure link under the Default Origin Servers section.
Click the Add Item button.
The “Select Origin Pool Method” will be set to “Origin Pool”. Under the “Origin Pool” dropdown menu select the “brews-spa-pool” you created earlier.
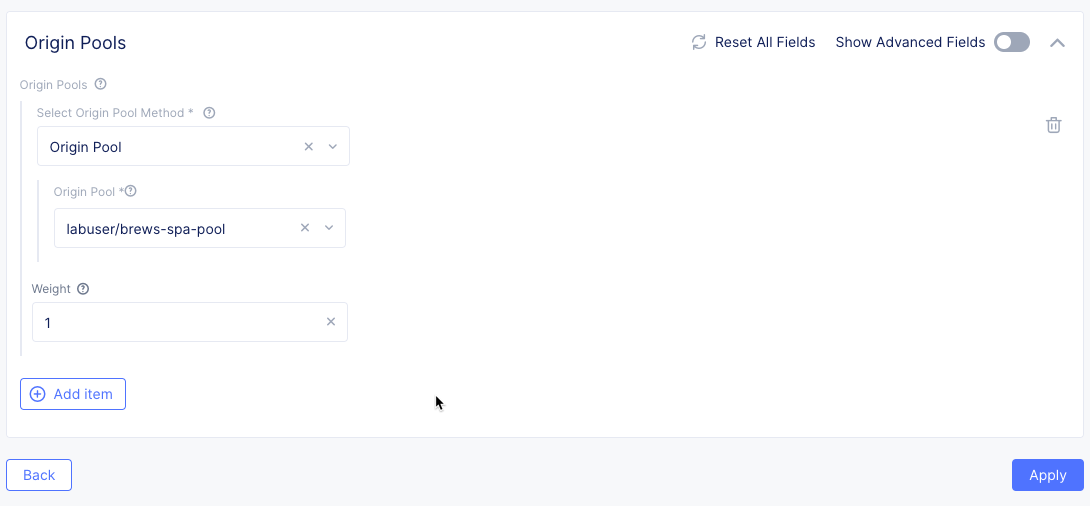
Click the Apply button to exit the “Origin Pools” dialogue.
Exercise 3: Configure Routes
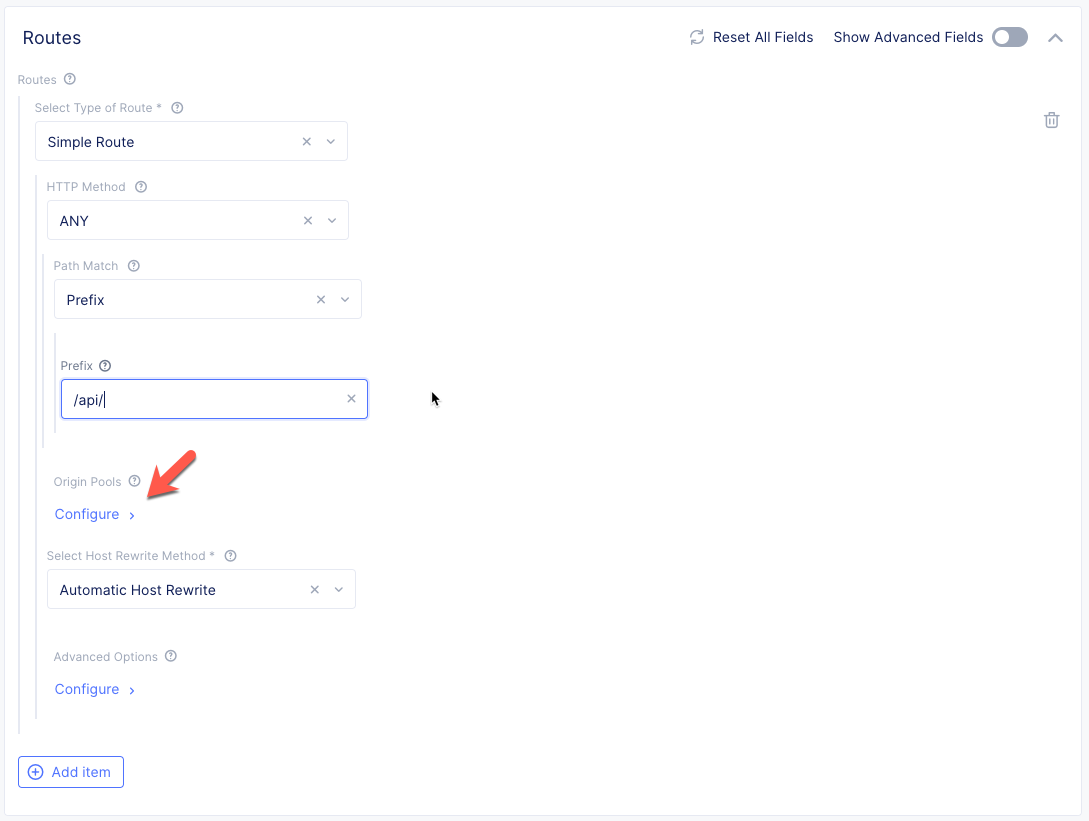
Now we’re ready to configure URL-based pool selection for the API service and static images. We will need 2 separate routes to send traffic to the API service – “/api/” and “/images/”.
In the Routes Configuration section toggle the Show Advanced Fields button. Click the Configure link.

Click the Add item button
Enter the following variables:
Variable
Value
Select Type of Route
Simple Route
HTTP Method
ANY
Path Match
Prefix
Prefix
/api/
Under the Origin Pools section Click the Configure link.
Click the Add item button.
Under the Origin Pool section select the dropdown and choose the “brews-api-pool” you created earlier.
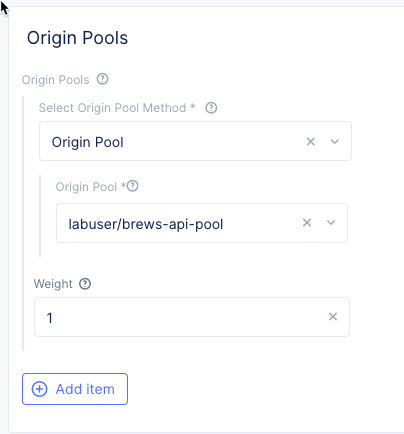
Click the Apply button to exit the “Origin Pool” dialogue and return to the “Routes” dialogue.
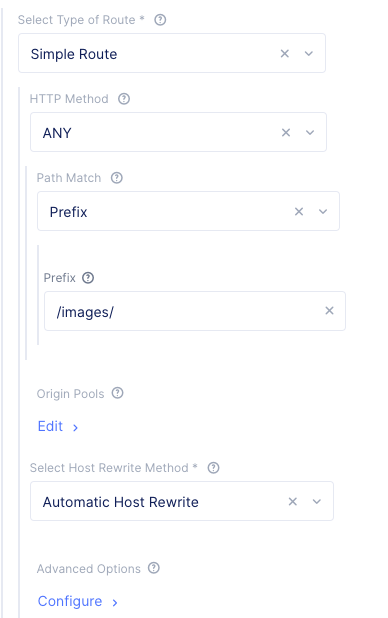
Click Add item to add a second route. Create a route for “ANY” HTTP Methods with a prefix of “/images/” that points to the “brews-api-pool” you created earlier.
Note
You should now have 2 routes created in the “Routes” dialogue.
Warning
Don’t forget for the second route, to configure an Origin Pool
Click Apply to exit the “Routes” dialogue.
Notice that in the “VIP Creation” section Advertise On Internet has been selected by default.

Click “Save and Exit to create the HTTP Load Balancer.
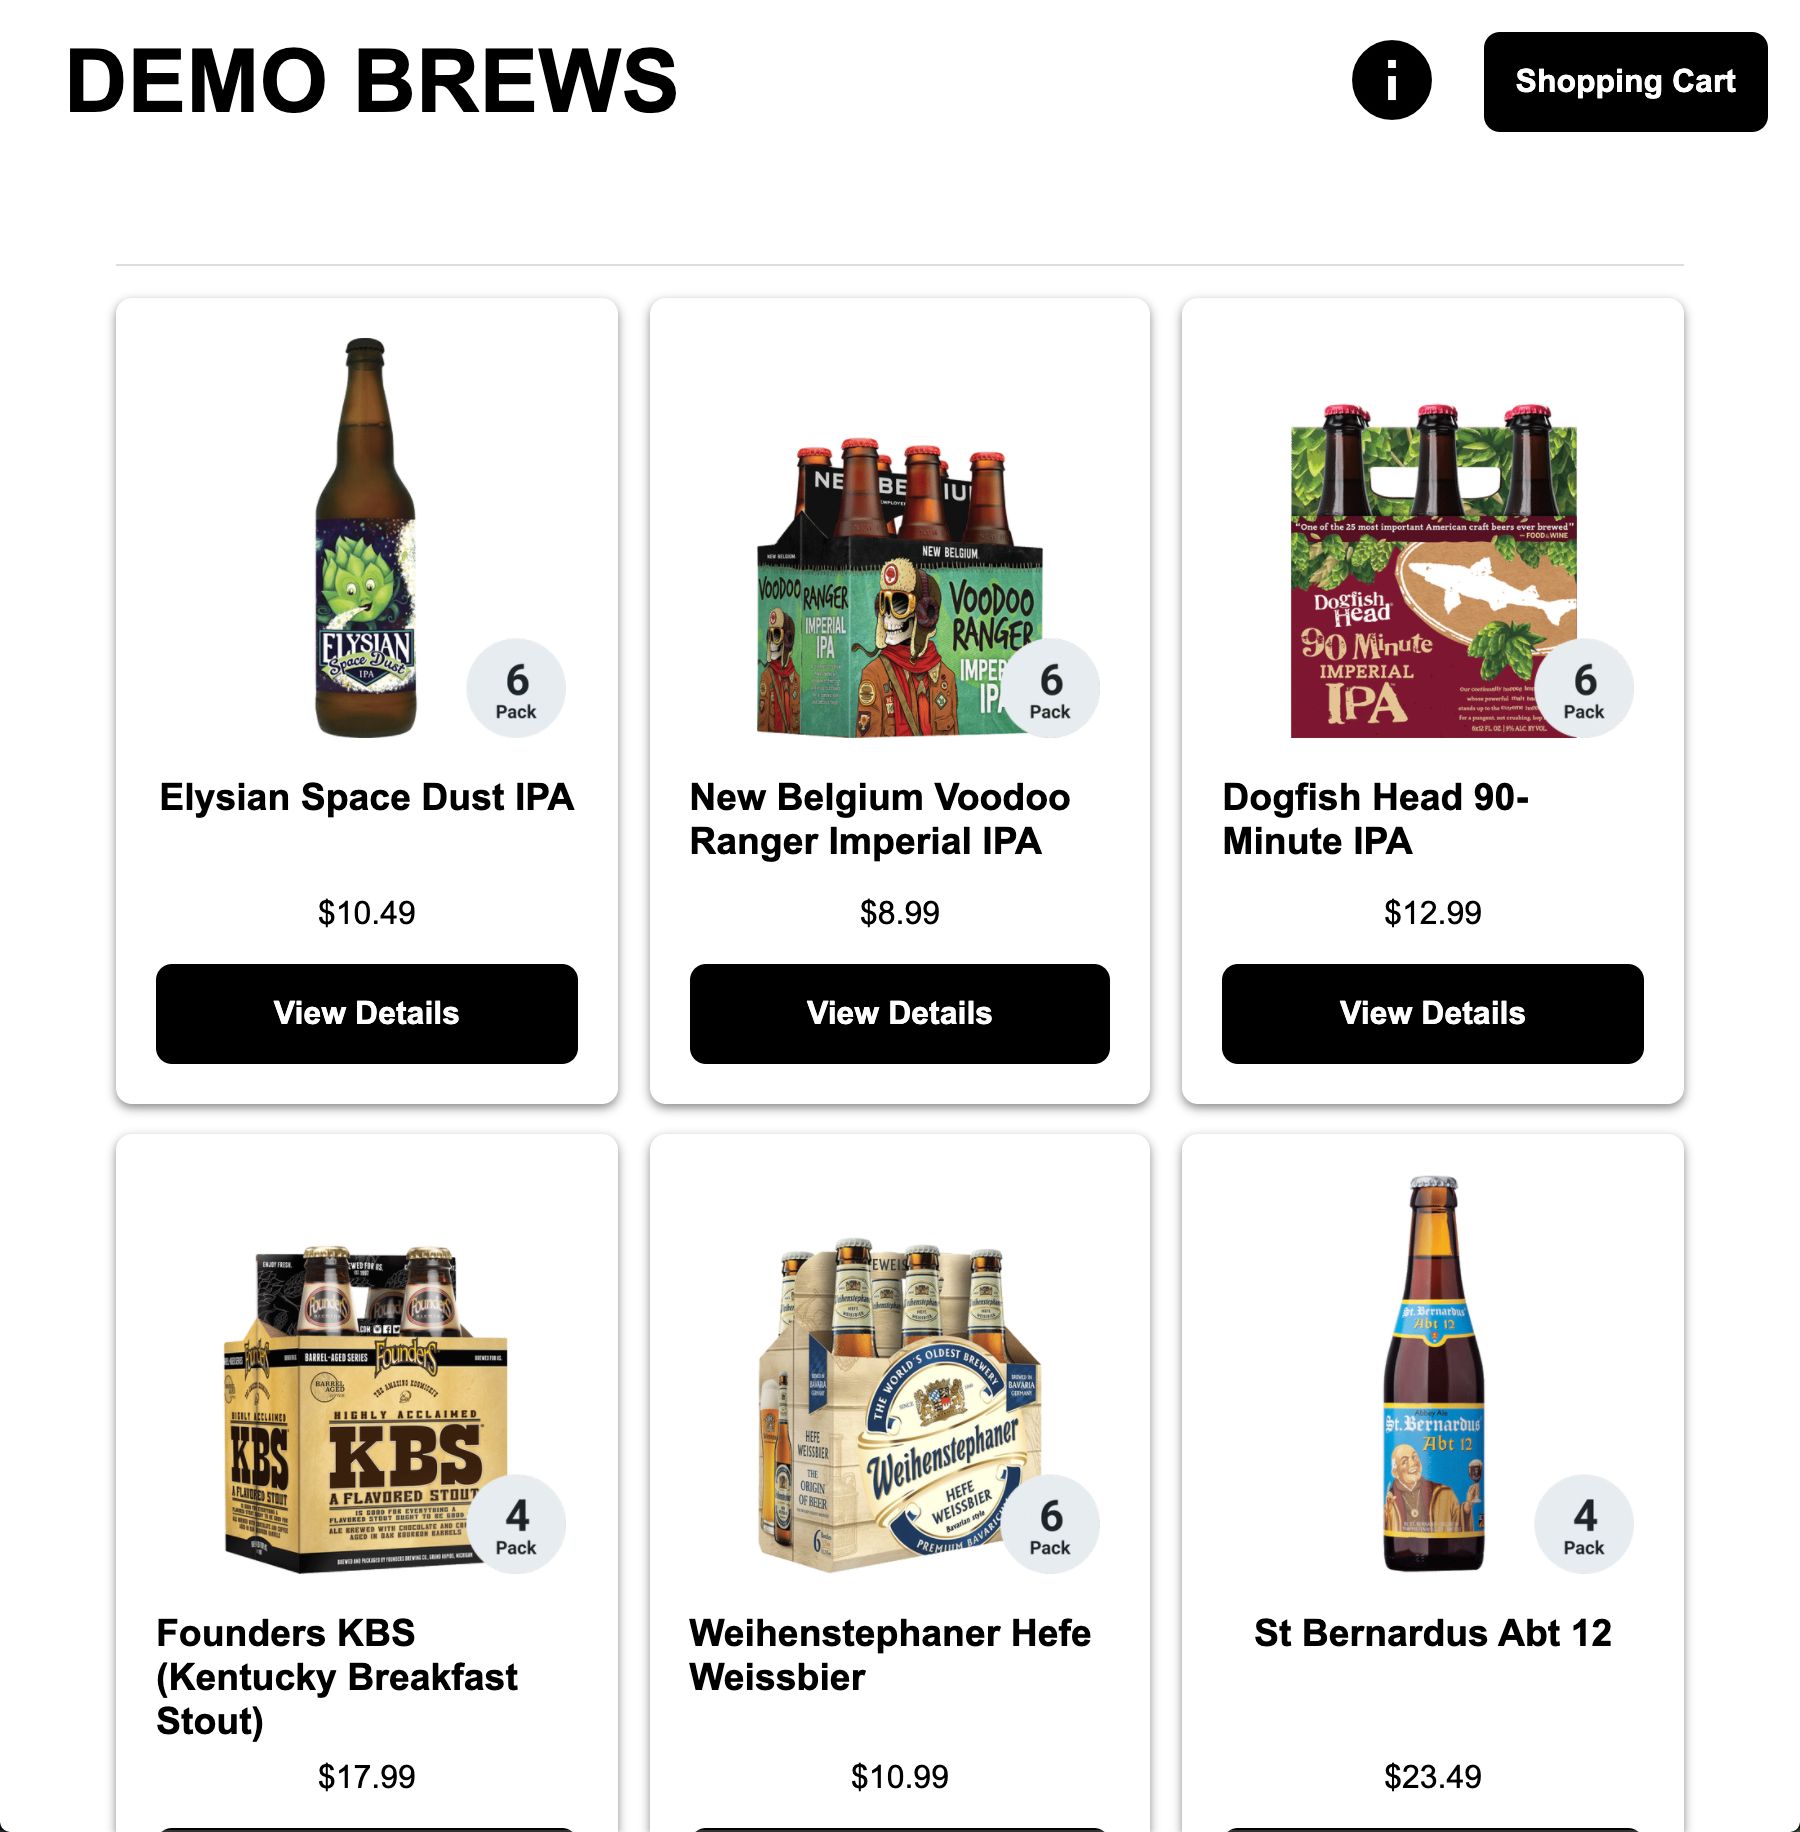
Once the HTTP Load Balancer has been deployed, you should now be able to go to the DNS name that you entered previously in a web browser. The FQDN we used in our example is http://labuser-brews.f5-consult.f5pslab.com. Your FQDN should follow the format of [unique name]-brews.[supplied domain name for your tenant].
The demo app should look like the screen shot below:
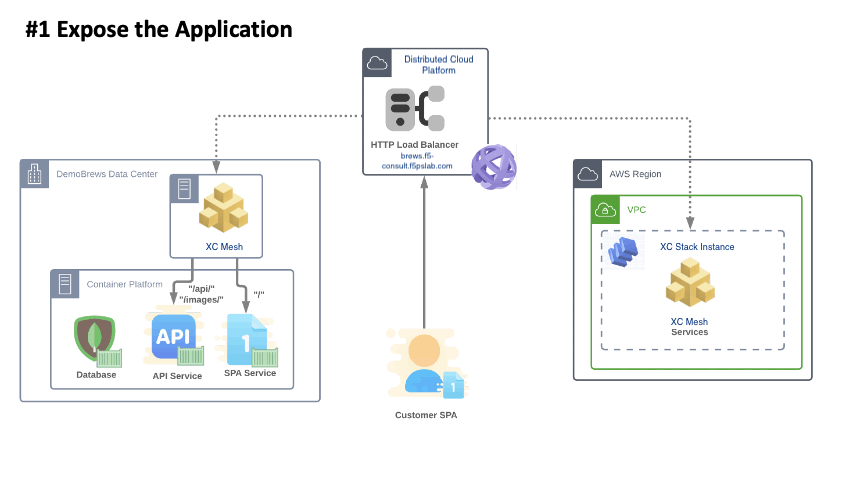
Packet flow
Below is the packet flow for the architecture you just deployed in F5 Distributed Cloud.

You have reached the end of this lab. For instructor-led courses, do not continue until instructed to do so.