Deploy Customer Edge Site (On-Prem)
Exercise 1: Create a Site Token
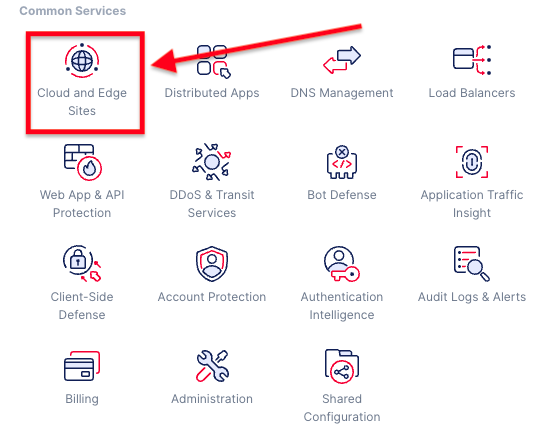
Next you will need to change to the “Cloud and Edge Sites” menu.
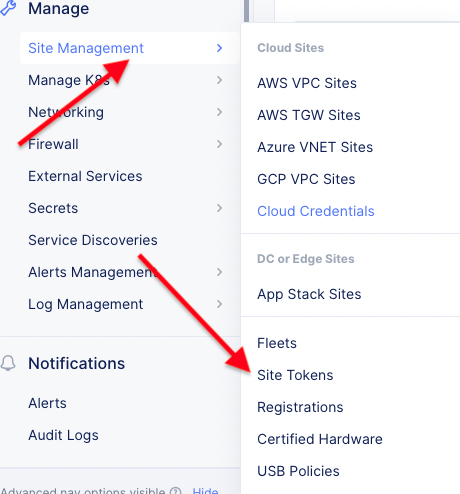
Once in the “Cloud and Edge Sites” menu you will need to go to the “Site Management” menu and select “Site Tokens”.
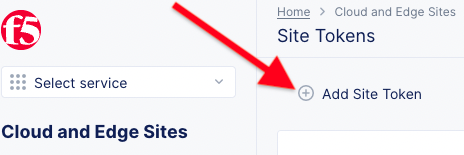
Click on “Add Site Token”.
Provide a name for the token. You can use the same unique name that was assigned for your namespace (i.e. first x-surname).
Record the “UID” that is created. You will later use this when you add a site.
Exercise 2: Add a Site
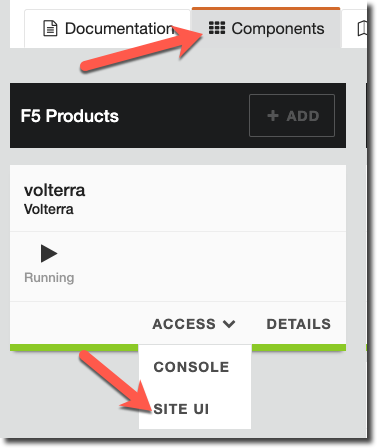
From your UDF Deployment find your “volterra” component and click on “Site UI”.
The local Volterra Node UI will prompt you to login:
Variable
Value
Username
admin
Password
Volterra123
Change the default password
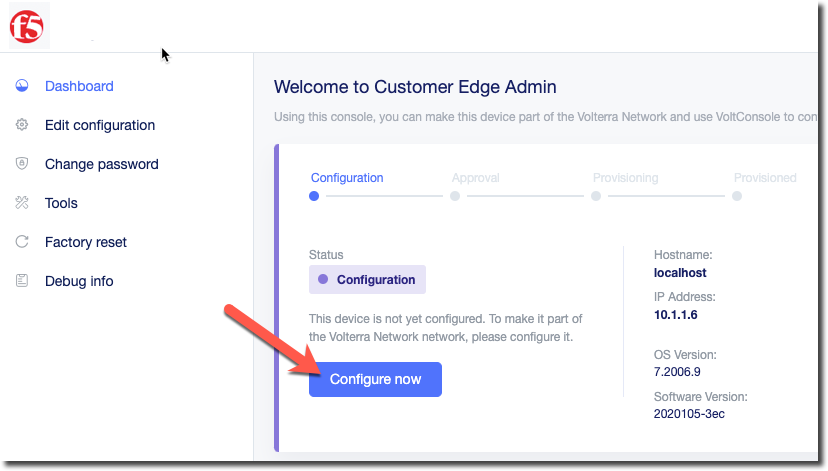
You will next need to click on “Configure Now”.
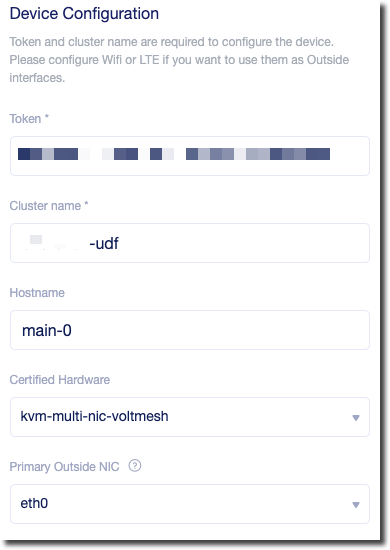
You will need to provide the following information.
Warning
Make sure you select “kvm-multi-nic-voltmesh” you will be unable to complete the lab unless you select the correct image.
Token: [use one created previously]
Cluster Name: [unique name]+udf
Hostname: main-0
Certified Hardware: kvm-multi-nic-voltmesh
Primary Outside NIC: eth0
Latitude/Longitude
Note
F5 Distributed Cloud uses the latitude/longitude of a site to assist in finding the closest geographic Regional Edge locations. The following is meant to help you find a location that is close to the UDF deployment location that you selected.
One method of finding a location is to search Google Maps, right click and highlight the GPS coordinates. This will copy the values into your clipboard.
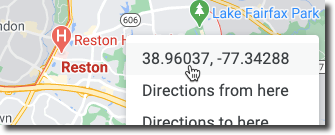
Pick a location that is geographically similar to where you selected your UDF deployment (i.e. for Virginia, USA search for Washington Monument, DC)
You could also use a regional office (vs. your home address) as a location https://www.f5.com/company/contact/regional-offices
Once you have a reasonable set of latitude/longitude you can proceed.
FYI the F5 Seattle office coordinates: 47.6, -122.3
You can then click on “Save Configuration”.
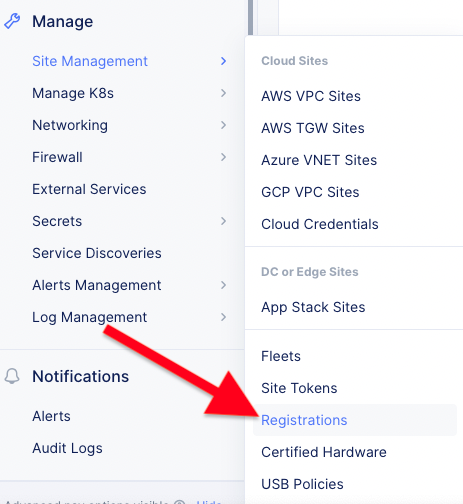
You will then need to go back to F5 Distributed Cloud Console to “Accept” the registration.
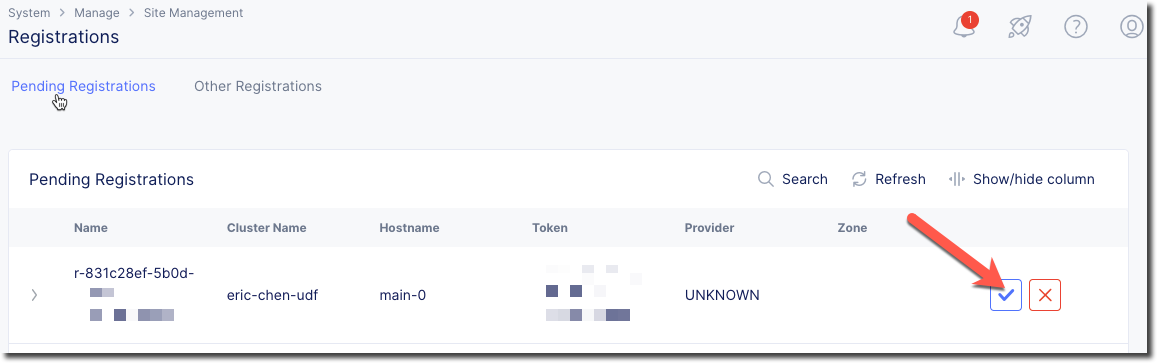
You will need to go under “System->Site Management->Registrations”.
Click on the “checkmark” icon to accept the registration.
You can then click on “Accept” to use the default values (we will modify these in a later lab).
This will start the process of loading the F5 Distributed Cloud software that is necessary to connect the site to a F5 Distributed Cloud Regional Edge site.
It will take several minutes for this to complete. You can continue to the next lab while you wait for it to complete.

You have reached the end of this lab. For instructor-led courses, do not continue until instructed to do so.